Make sure you are signed in to the app.
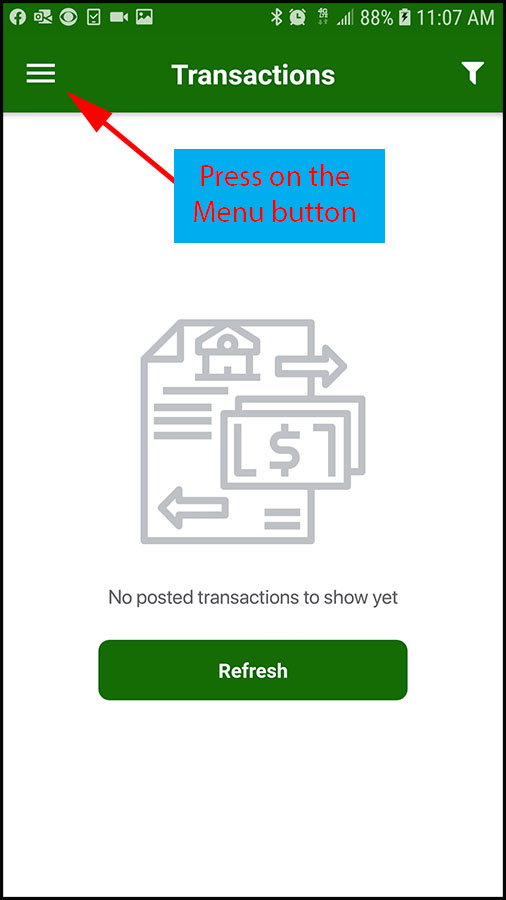
(1) If you are not on the “Budget Items” screen, Press the 3-line horizontal menu button in the top left corner of the screen to bring up the main Mazuma Pro menu. It doesn’t matter which screen you are currently on.
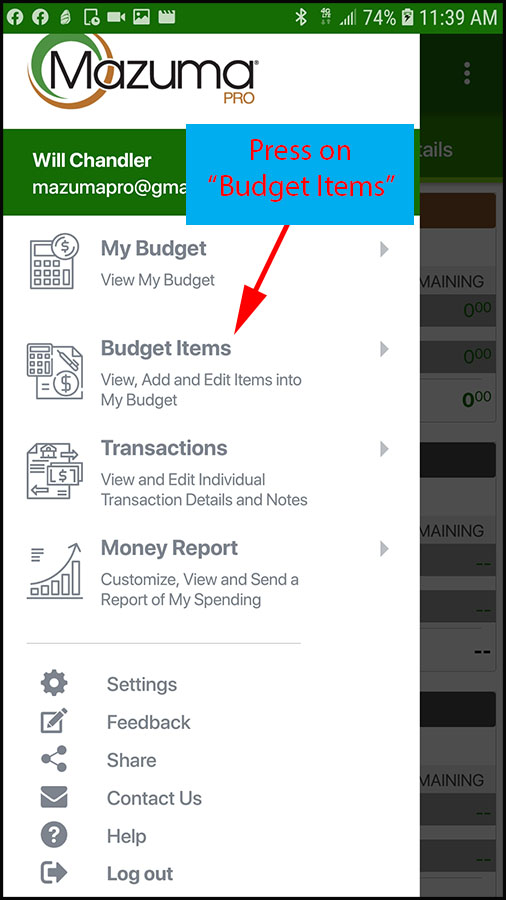
(2) After the main menu slides out, press on “Budget Items” in the menu list.
(3) You will be directed to the Add/Edit Budget items screen as shown below.
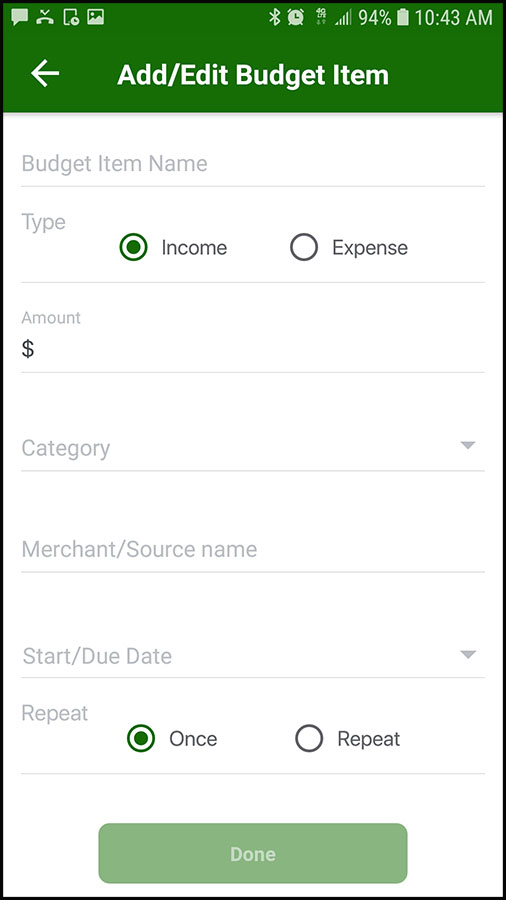
From here, you can start adding budget items.
(4) Press in the “Budget Item Name” space and type in a name for the budget item. Make it something easy for you as this will be the name showing up in your budget.
When you are finished typing the name, press “Done” or press outside the name entry box to save the name.
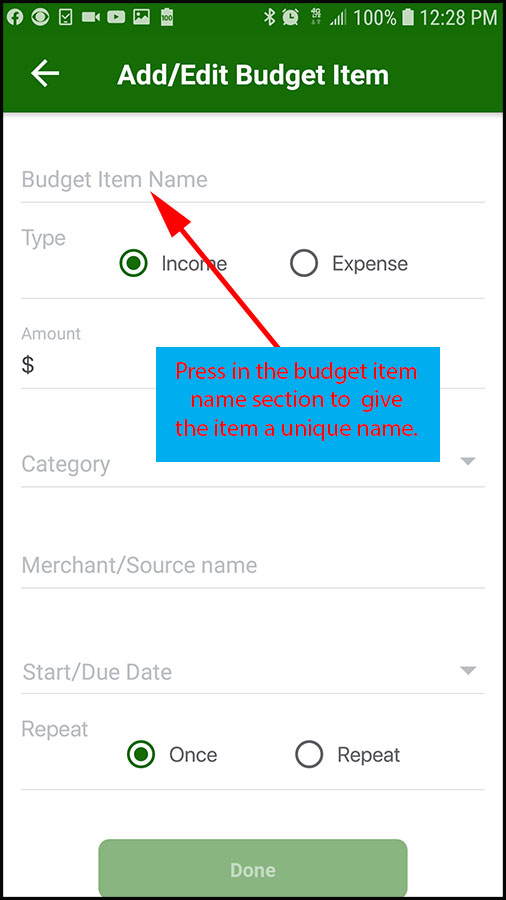
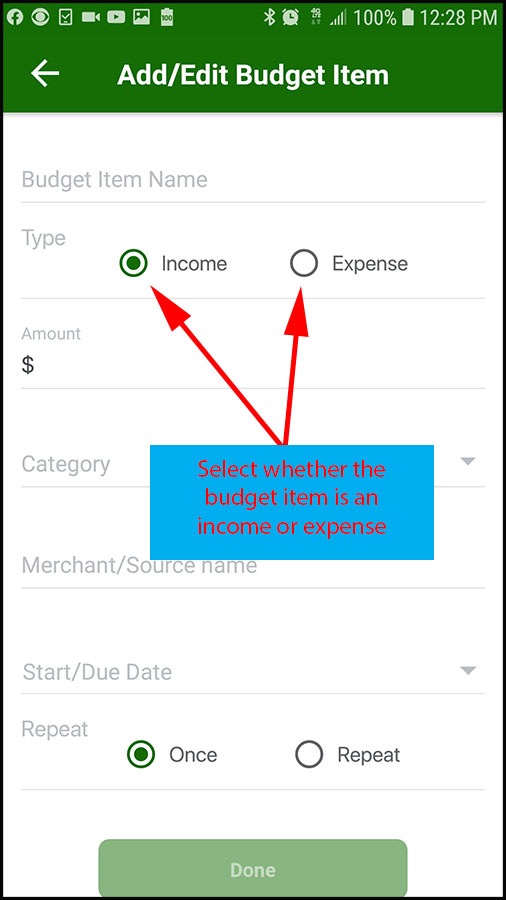
(5) Next, you need to select whether this is an income or an expense. Press on the expense button to change it to an expense. Press on the income button to change it back to an income.
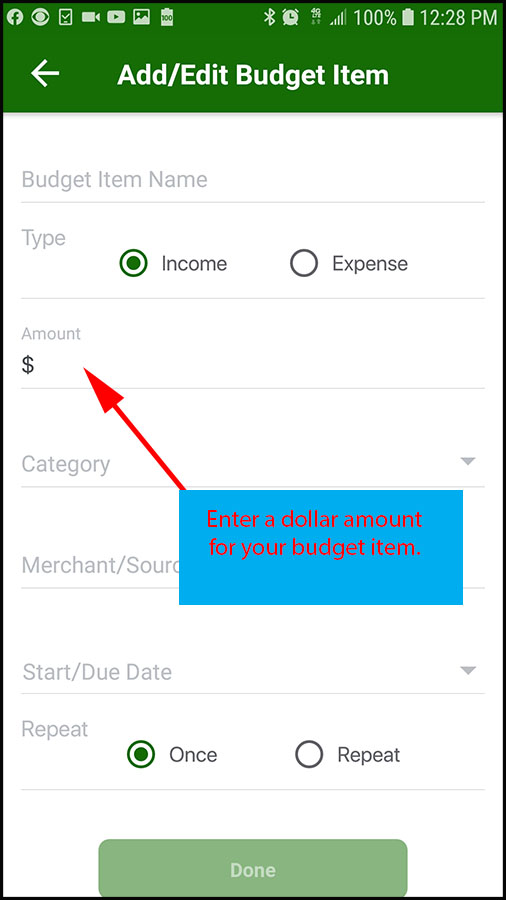
(6) Next, you can input a dollar amount for the budget item. When finished, select done or press somewhere out of the space to save it.
Tip —> For expenses, make sure you enter the maximum amount an expense might be and for income, enter the minimum amount an income may be. This will help you “Meet or Beat” your budget.
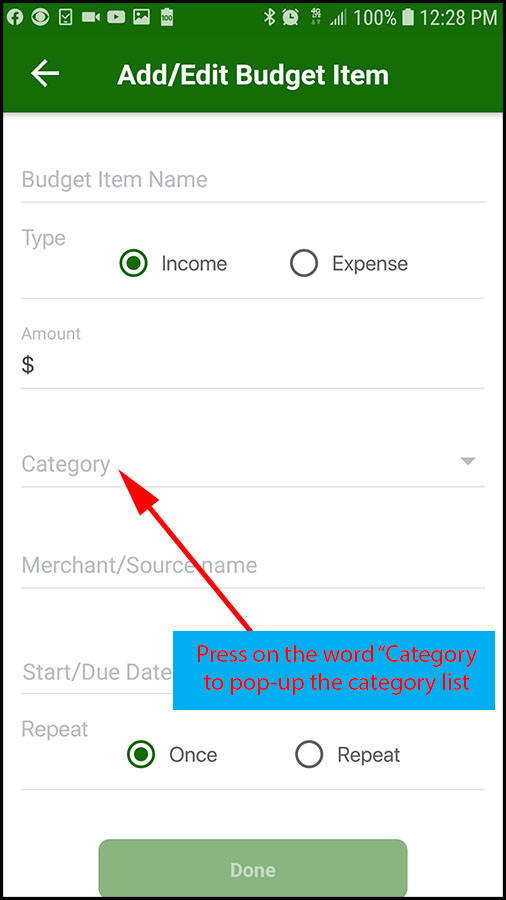
(7) You can now press on the word category and a selection list will pop up.
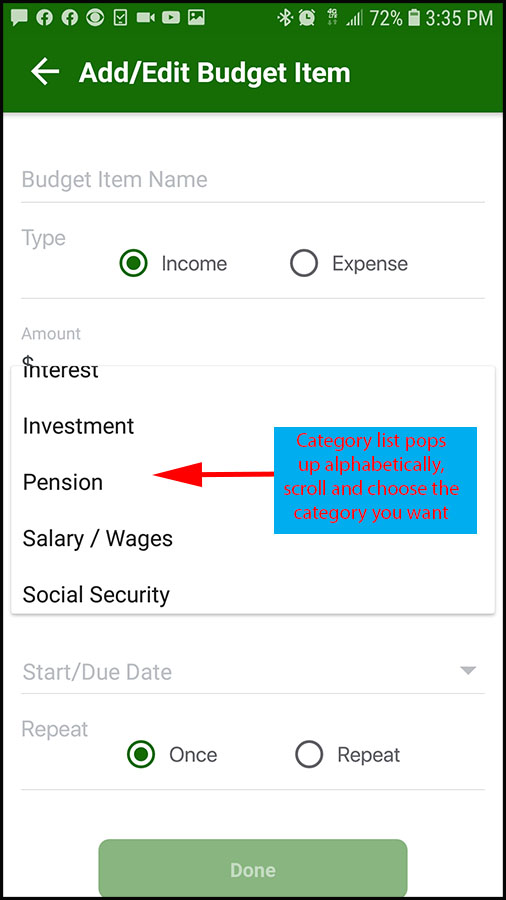
(8) Scroll down the list to select the category you want the budget item to be connected to. Press on the category you want and the list will close and the category you chose should now be listed in the category box.
(9) Optional – Press in the Merchant/Source name box and type in the name of the merchant or source for the budget item.
When you are finished typing the name, press “Done” or press outside the name entry box to save the name.
Note: Some budget items (like restaurants or gas) may not have a specific merchant and this can box be left blank. Or, it may always be the same (like the electric bill or mortgage/rent payment) and you can enter a name if you wish.
Note 2: When a transaction comes in from a merchant, you can add it to a budget item and “save” it so it always is assigned to that item by default. But you still can change it if you want.
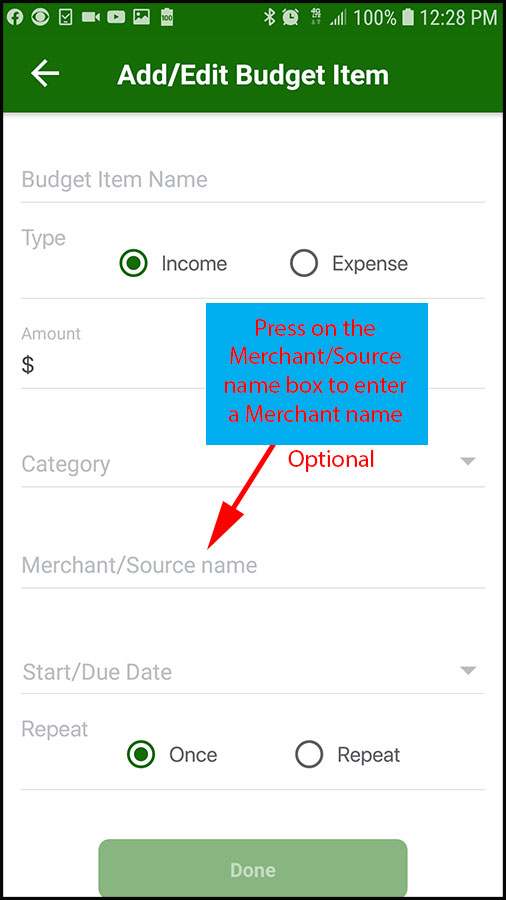
(10) Now it is time to add the Start/Due date. Press in the box area for the start/due date and a calendar will pop-up for you to select a date. Select the date you want the item to start or the due date and press done. The date should now be inserted into the box.
Note: Either enter the date you wish this budget item to start (for items in the future) or enter the next due date (for items that are started already and ongoing).
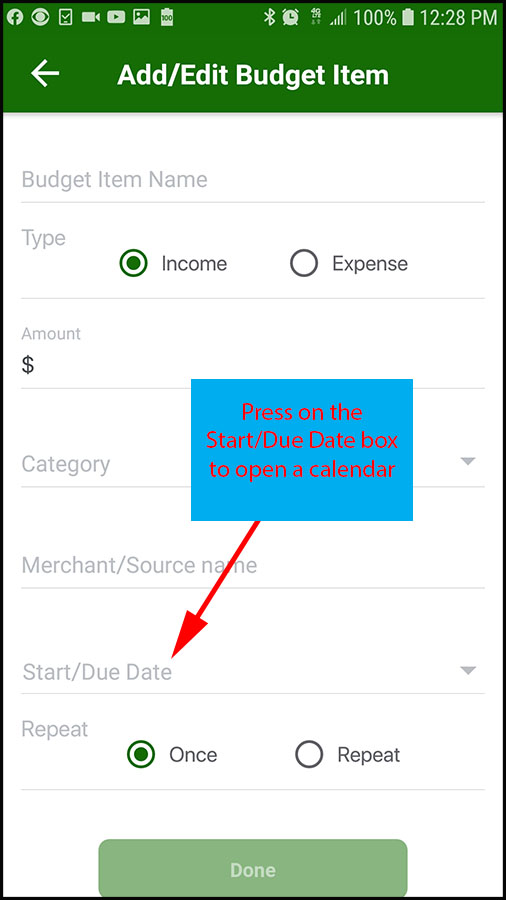
(11a) Next, you need to choose whether the item will happen once or if it will repeat. If you choose once, this item will appear in your budget only one time on the date you entered.
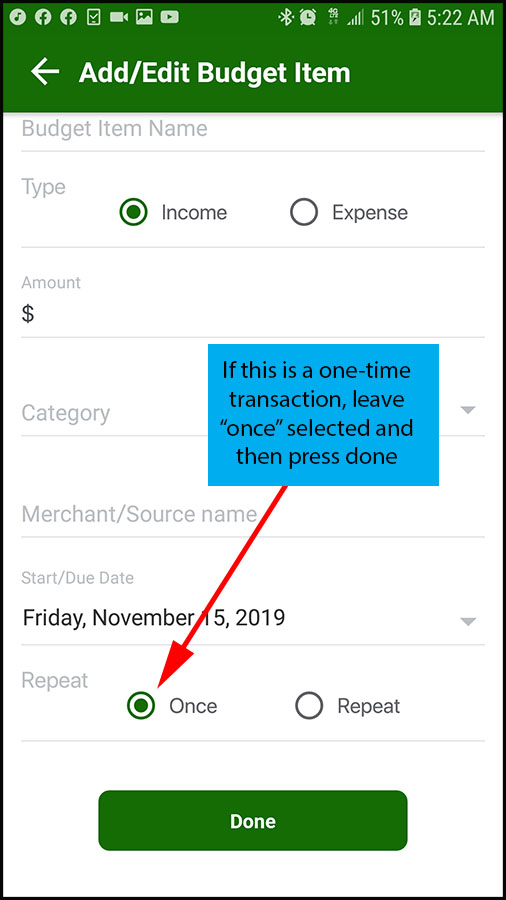
(11b) If you select repeat, more options will pop-up for you to select the repeat rate. You may need to scroll down to see the rest of the screen.
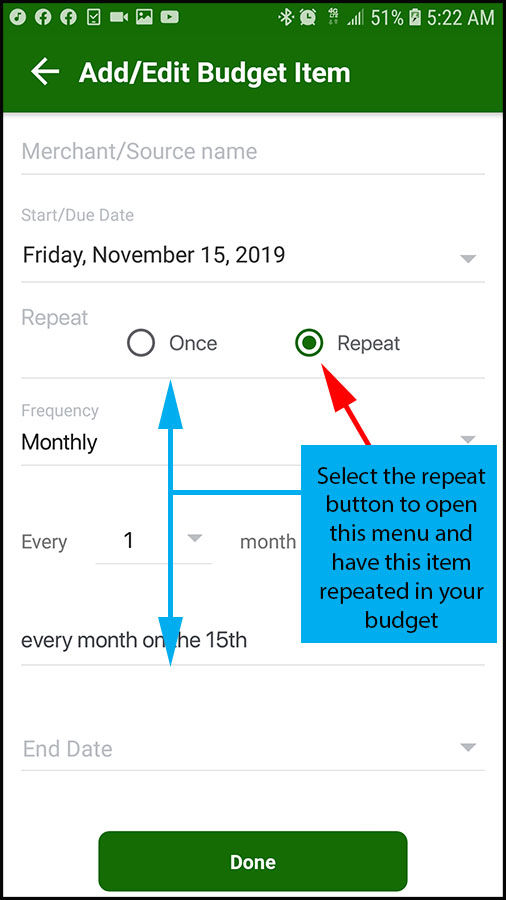
(12) Press on the frequency box to set the repeating rate for the budget item. A list will pop-up for you to select daily, weekly, monthly or yearly. Select which frequency you want for this budget item. Each selection has more options below it to set the exact repeating rate.
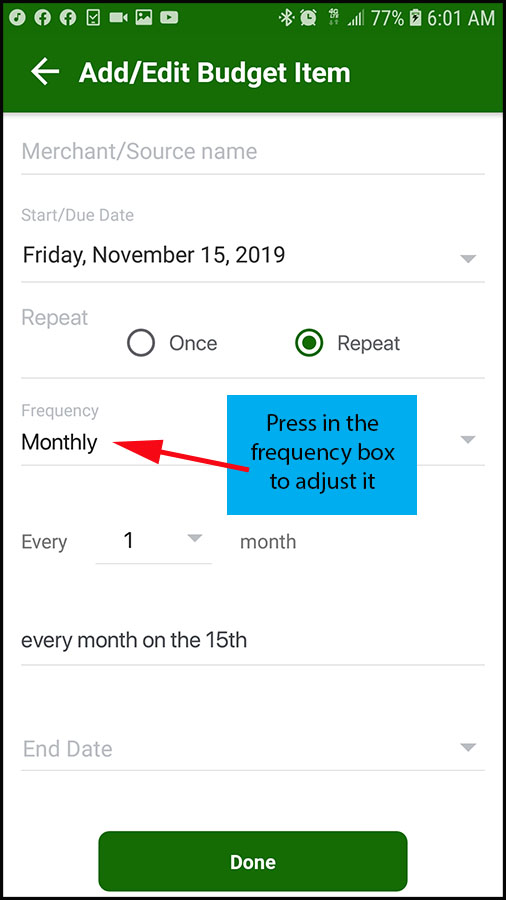
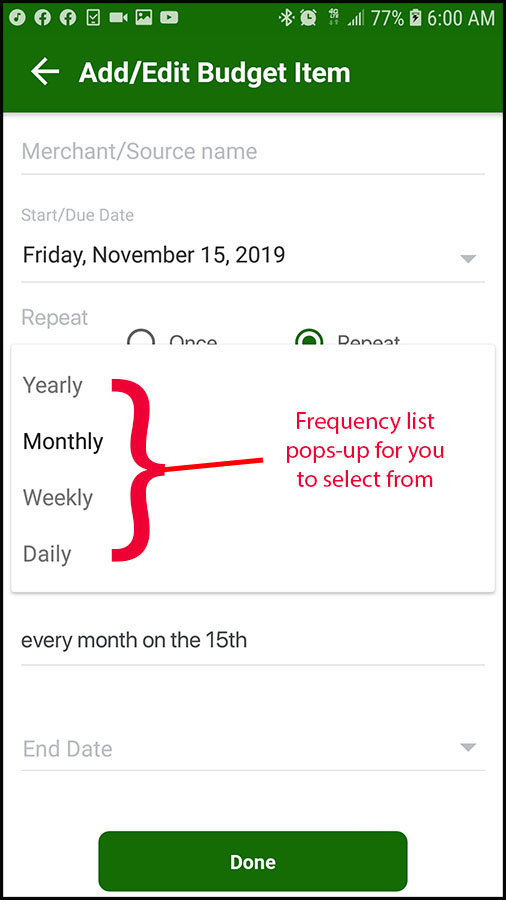
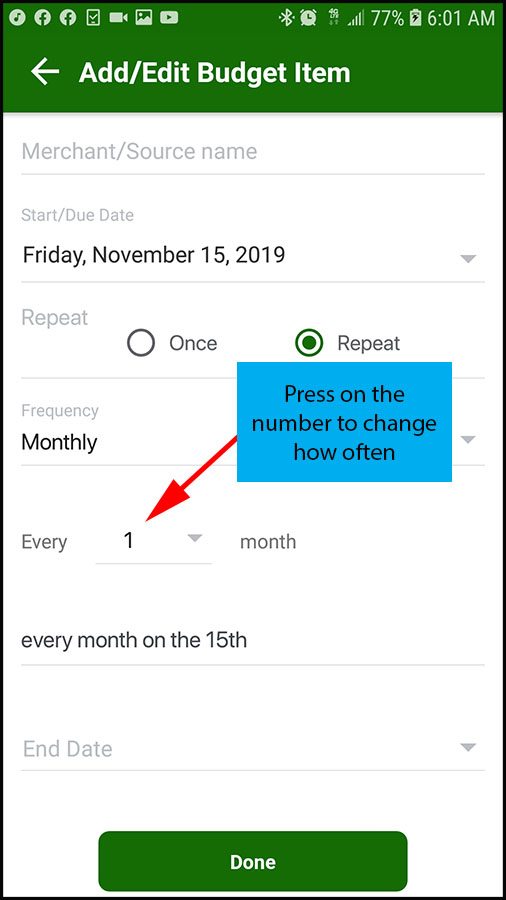
(13) You can now select how often you want the budget item to repeat.
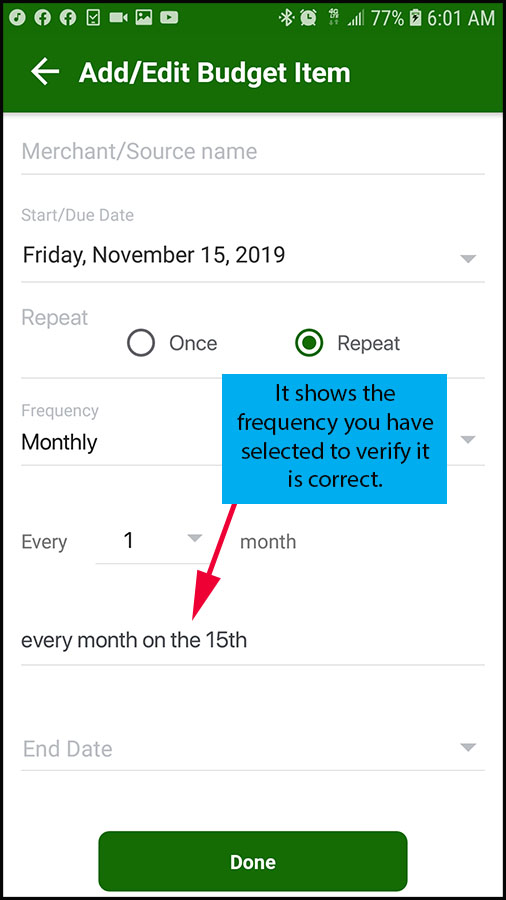
(14) The frequency you selected shows up on the screen following the frequency selection.
(15) If the budget item will end, such as a vehicle payment or mortgage, you can enter an end date here. Press on the end date box and a calendar will pop-up for you to select a date. Press done, or outside the box, to save it.
If it is a living expense or something that will basically continue forever, then you can leave this line blank.
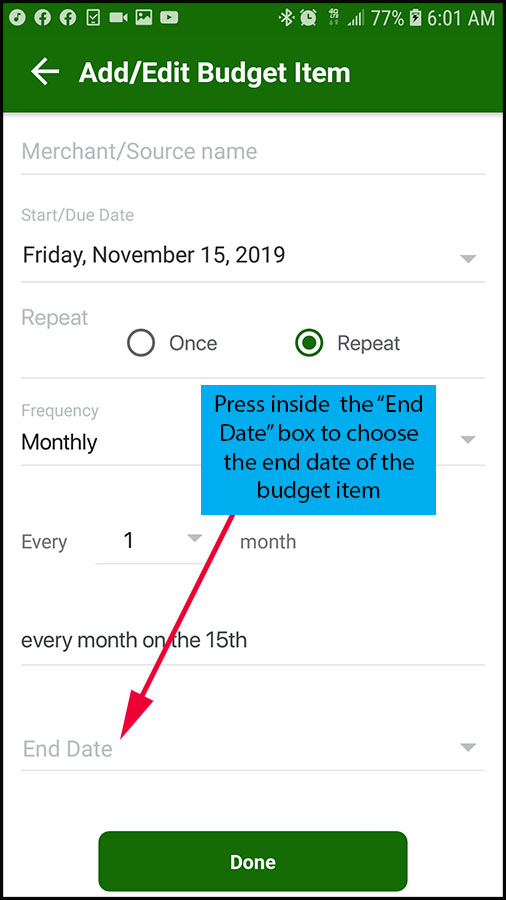
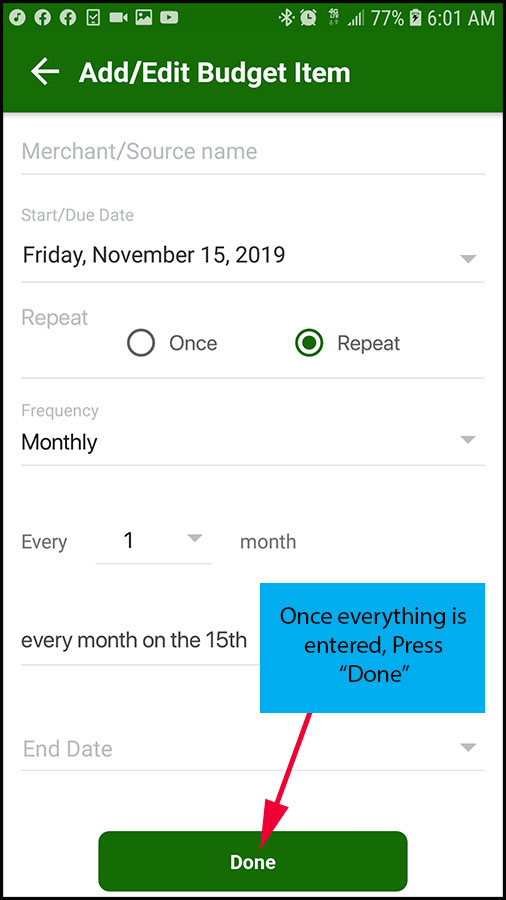
(16) Once all the information is filled out, you can select “Done” to save the budget item.
(17) You will get a confirmation that the budget items was saved successfully.
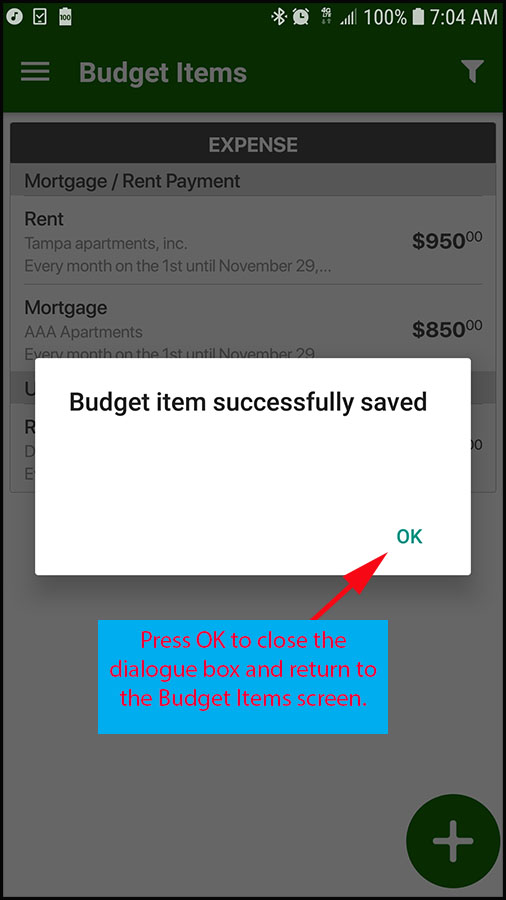
(18) After you select OK. You will be taken back to the budget items screen where you can view the item you just added into your budget.
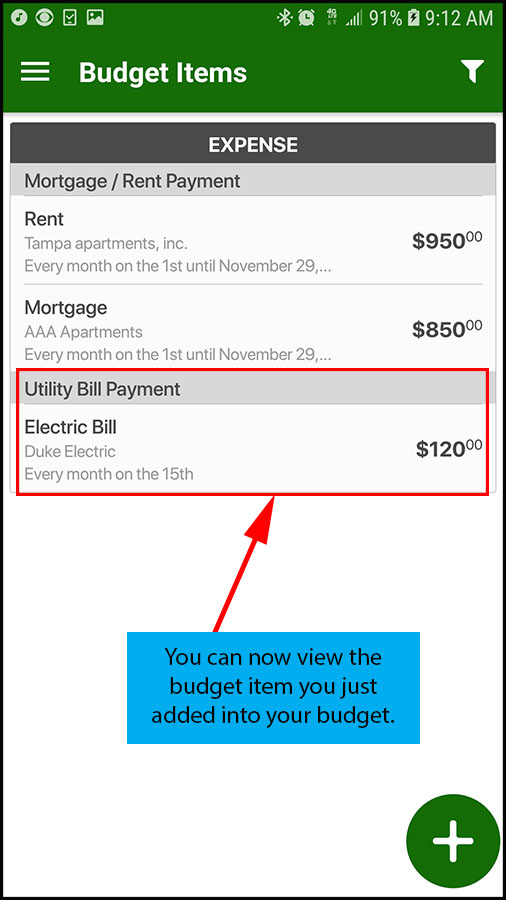
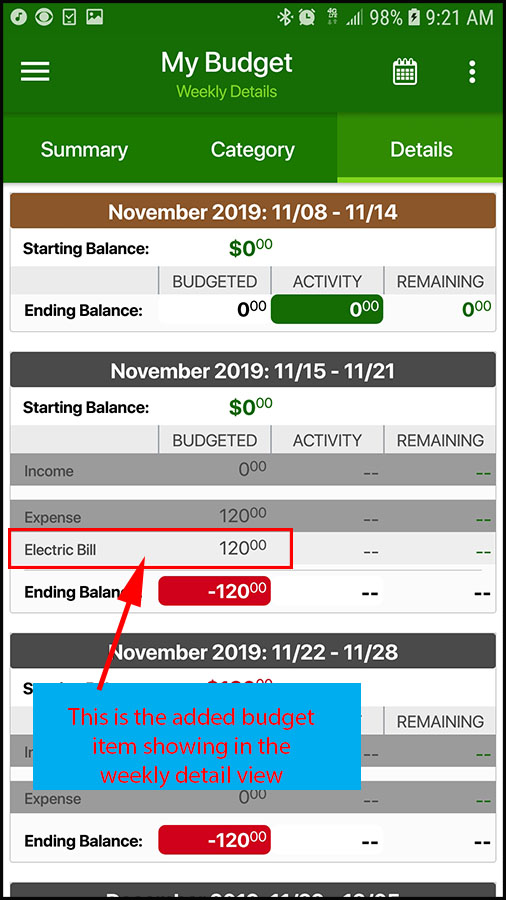
You have finished adding a budget item into your budget. It is listed in the budget items list and can now be viewed in your budget. (see example below)
** See “How to edit a budget item?” FAQ to learn how to edit a budget item that has already been entered.







One thought on “How do I add a budget item into Mazuma Pro?”
Comments are closed.