Be sure you are signed into the Mazuma Pro app.
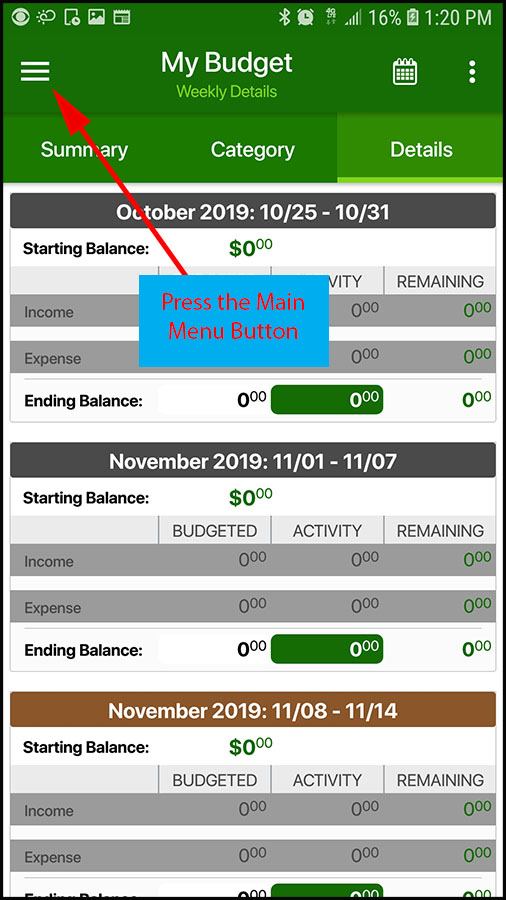
(1) Press on the 3 horizontal line main menu button in the top left corner.
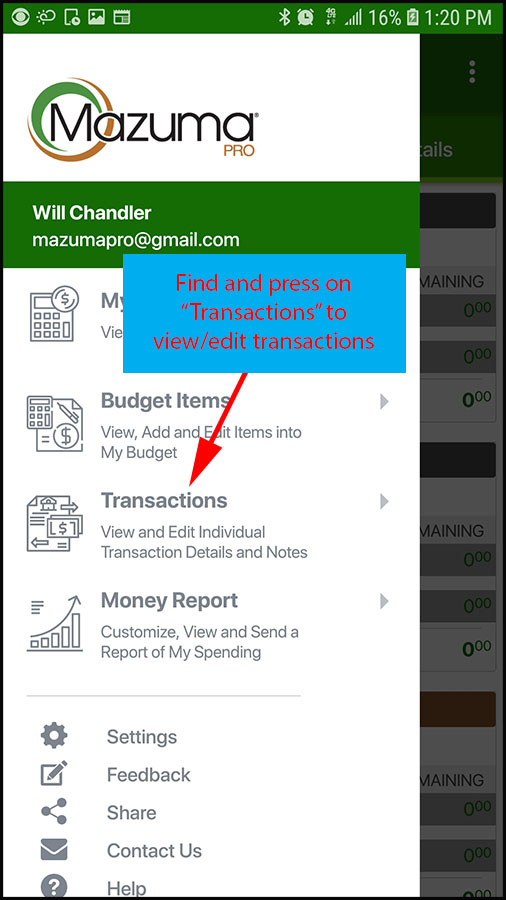
(2) Find “Transactions” on the menu list and press it. This will take you to the “Transactions” screen.
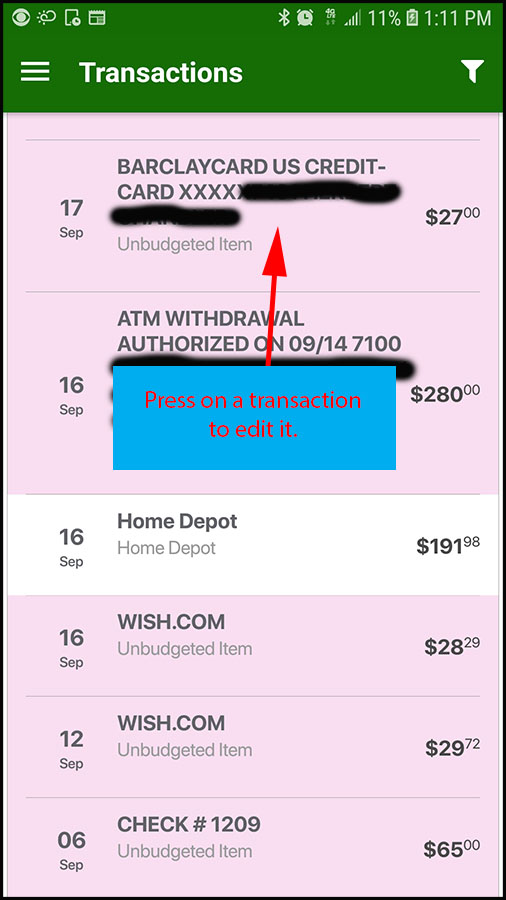
This is the transaction screen where you can scroll up and down to view all your transactions.
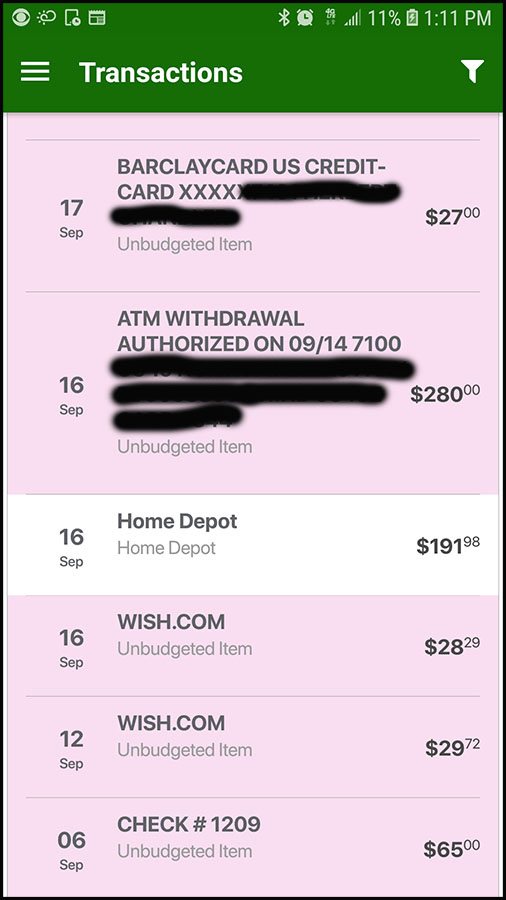
From this screen, you can select a transaction and edit some of the details and attach it to a budget item.
(3) To edit a transaction, press on the transaction you want to edit.
The edit transaction screen will pop-up.
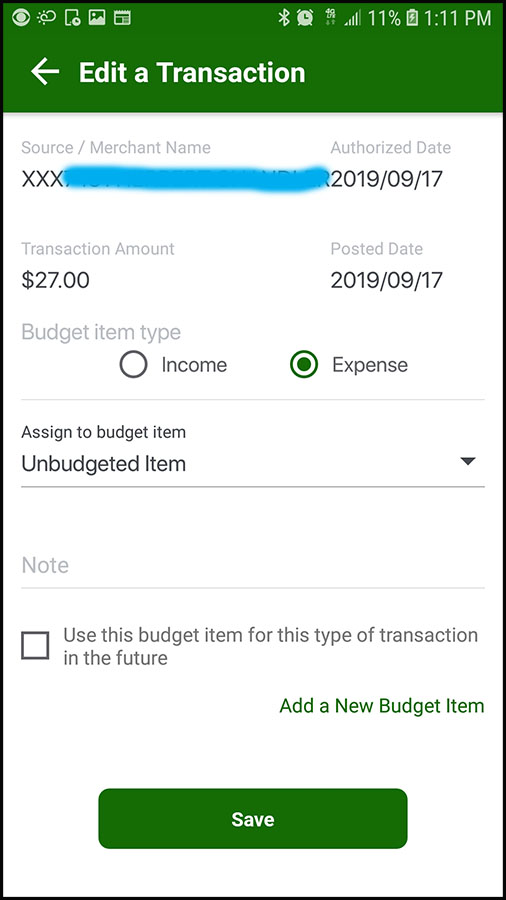
From this screen, you can edit some of the transaction details.
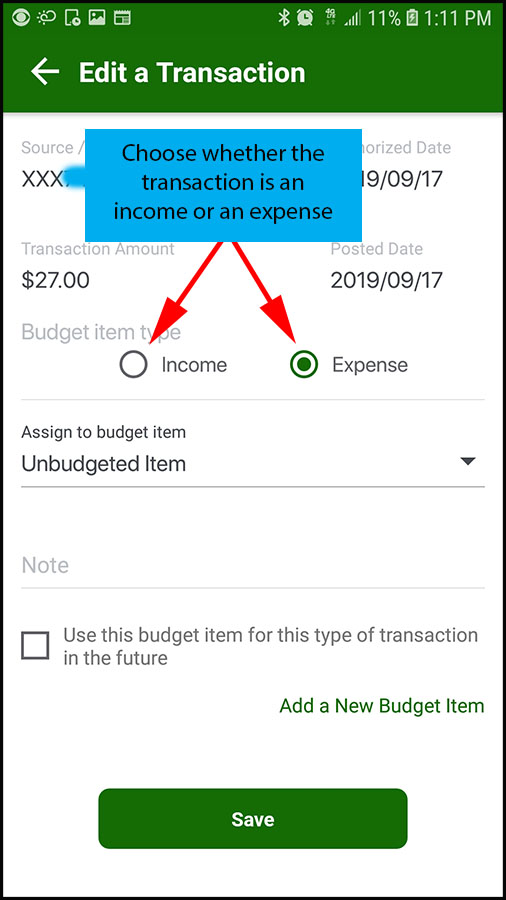
(4) You can assign whether the transaction is an income or an expense by selecting the corresponding radio button.
Note: A deposit might register as an income but it is actually a refund from an expense and therefore should be listed as an expense. this is where you would change that.
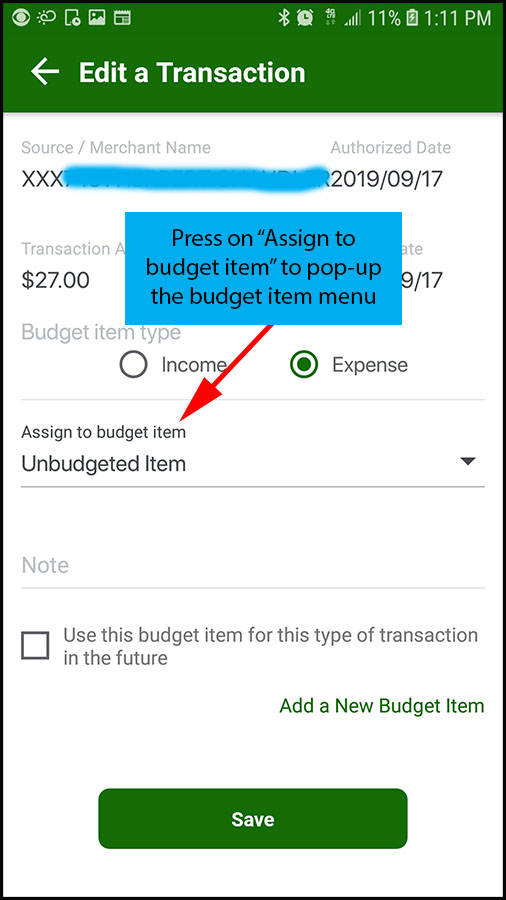
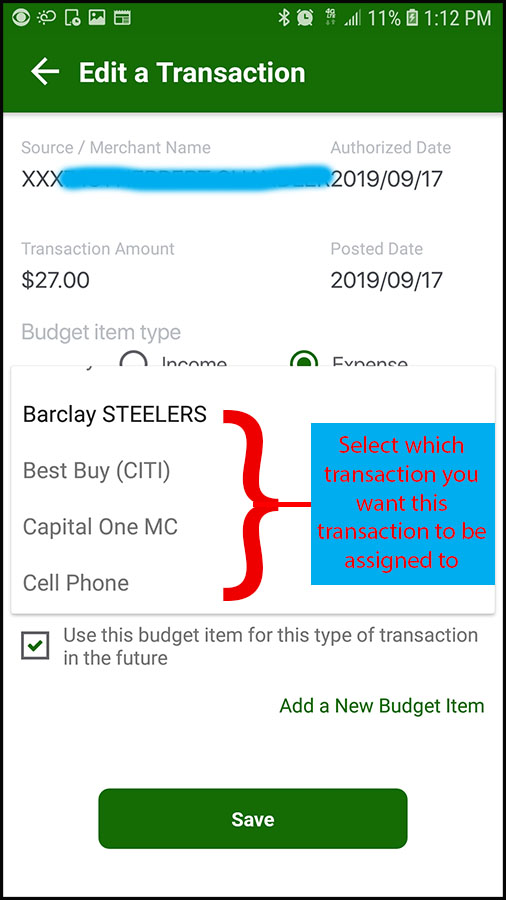
(5) Press on “Assign to budget item” to assign the transaction to a budget item you have already created.
Note: if you do not have a budget item for the transaction, go to step #9.
(6) When the list pops-up, you can choose which budget item the transaction goes with. Scroll up and down the list to find the one you are looking for and then select it by pressing on it.
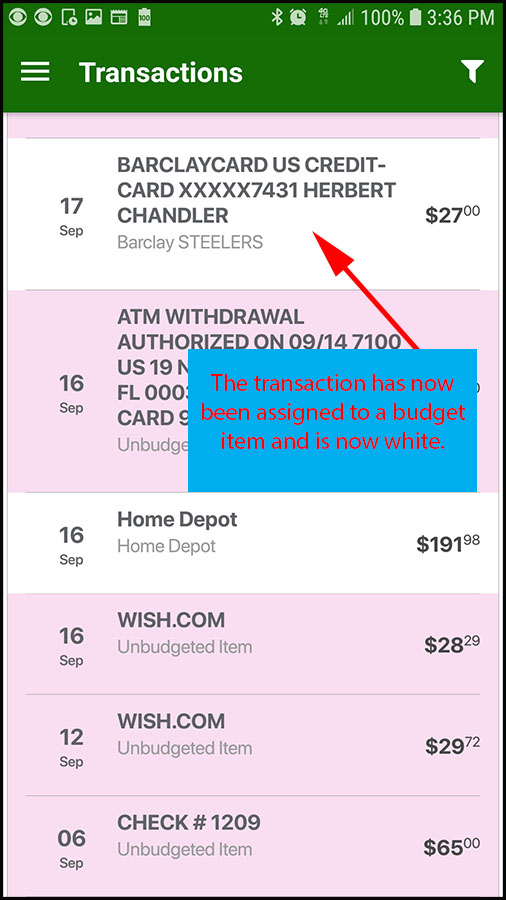
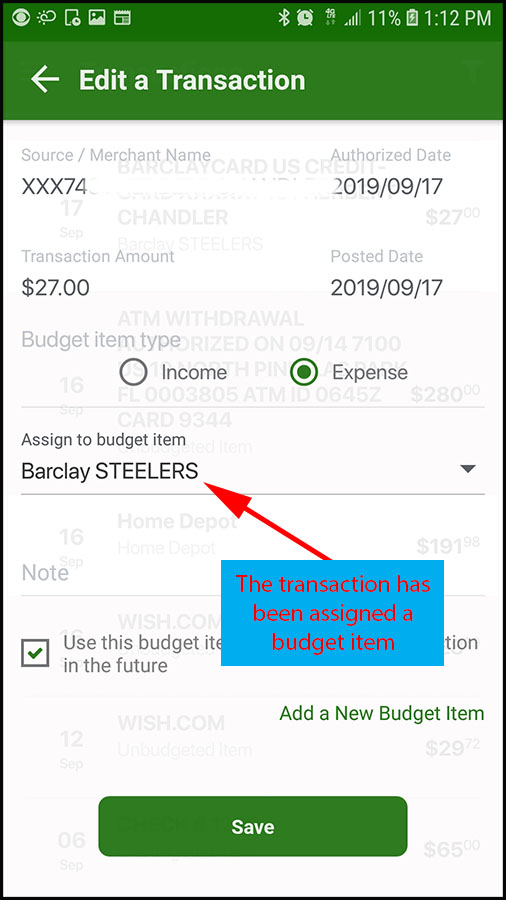
As you see below, the transaction has now been assigned to a budget item.
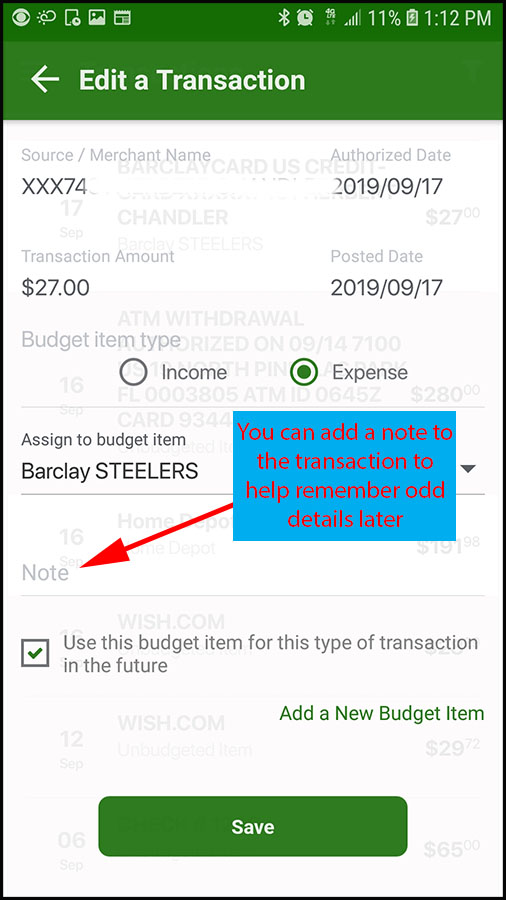
(7) You can add a special note to the transaction if you want to remember details later. Example: like “Mom’s birthday present”. Or “Trip to Vegas”
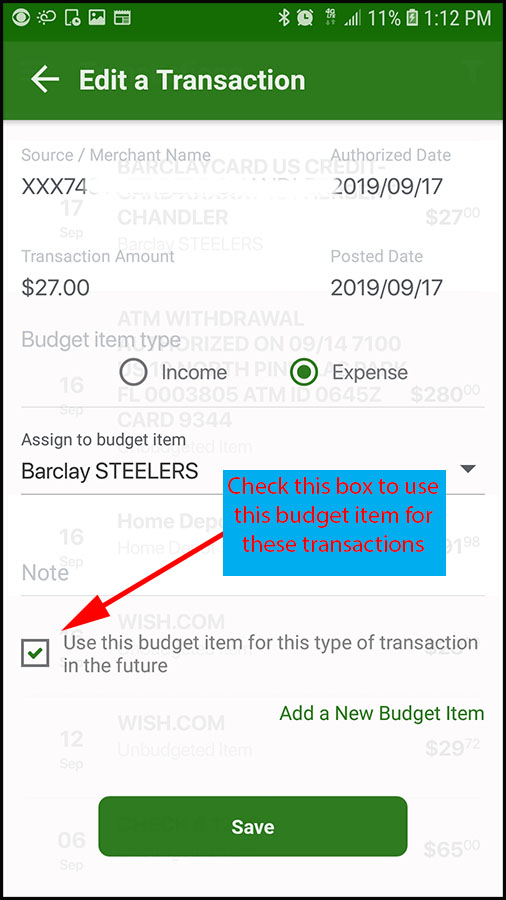
(8) The item can be permanelty assigned to this budget item by selecting the box next to “Use this budget item for transactions in the future”
Note: This box is selected by default. The budget item can still be manually changed if the transaction needs to be assigned to a different budget item.
(9) If you did not have a budget item set-up for this transaction, you can either leave it as an unbudgeted item or “Add a new budget item” by pressing on the “add a new budget item” link.
Note: if you add a new budget item, please see “How to add a budget item” for help adding a budget item.
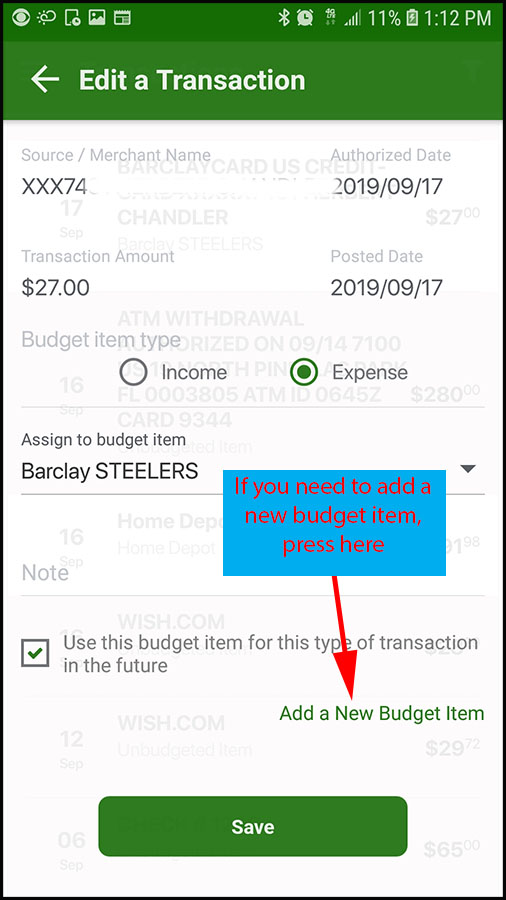
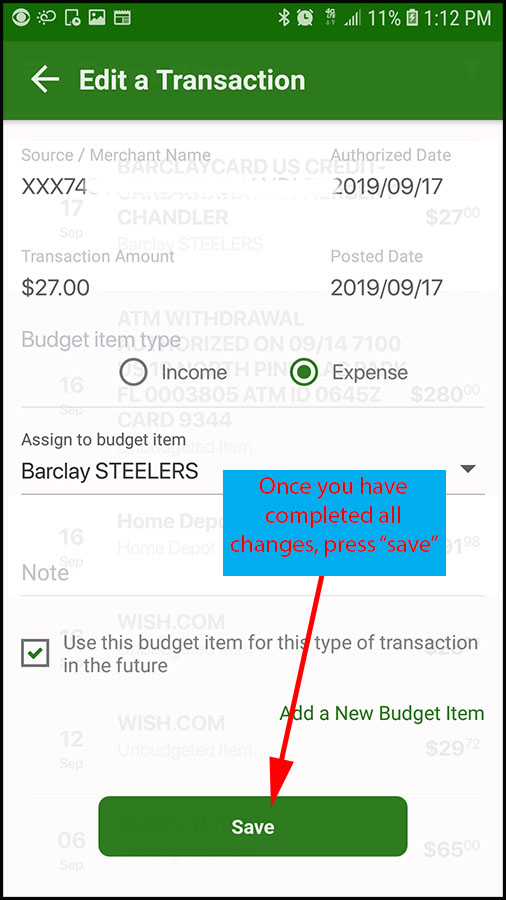
(10) When you have changed everything you need to change, Press “Save”.
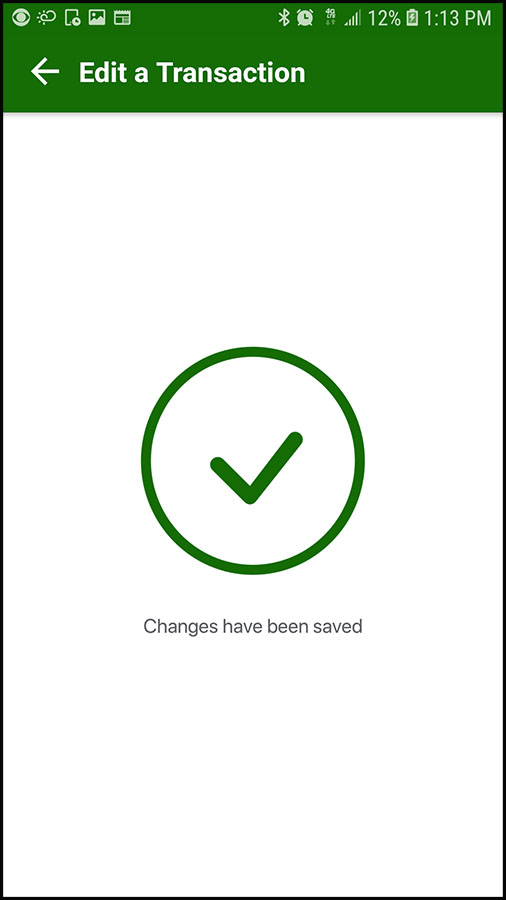
(11) You will receive the following confirmation that changes have been saved.
(12) The transaction will now be assigned to that budget item and will change to white in the transaction list.
